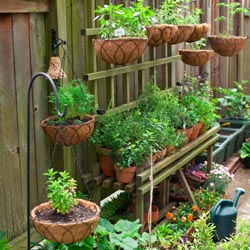
Growing herbs, whether inside or out, may be one of gardening’s most gratifying experiences. Because of their beauty and versatility, herbs may be grown amid vegetables, ornamentals or in a garden dedicated strictly to their kind. They may be nurtured in a sunny window box, strawberry pot, whiskey barrel or just about any container you choose. Situate your herbs for easy access: on the patio, deck, a sunny windowsill or in the kitchen garden. Herbs are relatively carefree and have a multitude of uses that include but are not limited to: culinary, aromatic, ornamental, medicinal and insect control.
Herb Growing Tips
Choose a full sun location, 4-6 hours per day is best. Herbs will grow in a shadier location, but plants will be weak and thin. Most herbs are not demanding of soil fertility. One thing that they will not tolerate, however, is wet or poorly drained soil, so be sure not to overwater your herbs.
Locate herbs in or near the kitchen for easy access when cooking. Be aware of the ultimate size, height and spread of the herbs that you plan to grow. If you take this into consideration you can assure room for the plants to reach their full potential. Position taller herbs to the back of the garden or container and shorter herbs to the front; this will allow for easier access and prevent shading.
Water pots before planting. Remove plants from their pots and loosen roots to stimulate new root growth. Place plants at the same soil depth that they were in the pot, or slightly higher to avoid rotting. Gently firm soil around each plant, water carefully and mulch if desired. Feed monthly with a mild, organic fertilizer such as Neptune’s Harvest Fish & Seaweed Fertilizer 3-2-1.
Some herbs, such as mints, have a tendency to be invasive and may take over an entire herb garden or even spread into the lawn or other parts of the landscaping. Sink aggressive potted herbs directly into the garden to minimize this overgrowth. Pull up pots each spring to replenish their soil, then sink the containers back into the garden for another season.
Growing herbs indoors is also quite simple. Choose herbs that will not get too large to handle inside. The same soil requirements apply for both indoor and outdoor planting. Select a south or west window to situate your plants so they receive adequate sunlight. It may be beneficial or necessary to supplement with artificial lighting during the winter months. Provide humidity by grouping plants together and misting daily. Another option is placing potted herbs on a humidity tray. Fertilize monthly with Neptune’s Harvest to provide the best nutrition.
Harvesting
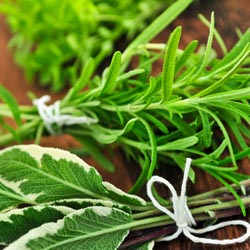
Fresh herb leaves are ready to be harvested as soon as there is enough foliage to maintain the plant. Try to harvest in the morning, after the dew has dried but before the sun becomes too hot, using a sharp knife or scissors to make each cut. It is a good idea to harvest only what you plan to use at time of cutting, as herbs do not store well in the refrigerator. With most herbs it is beneficial to harvest before the plants go to flower, as the taste is better at this stage of growth. Rinse with cold water and pat dry before using.
Drying
If you have excess herbs, you may want to dry them for future use. After gently rinsing the harvested herbs, drain them on absorbent towels, tie in bunches and dry thoroughly by hanging bunches up in the sun just until all water evaporates from the surface of the herbs. Remove plants from sun and hang in a clean, dark, dry location with good air circulation for 1-2 weeks until herbs are completely dry and brittle. If not dried completely the herbs will become moldy in storage. Remove leaves from the stem and store them in an airtight container in a cool, dry, low light environment. Check container in a few days for condensation. If there is any moisture in the container you must start the drying process again, after checking carefully for any mold or mildew.
You can also dry herbs in a conventional or microwave oven. With a conventional oven, position clean herbs in a single layer on a shallow pan. Place baking pan in a 180°F oven for 2 to 4 hours. When using a microwave, place clean herbs in a single layer on a paper towel or plate. Cook herbs on high for 1 to 3 minutes, rotating the plate every 30 seconds or moving the leaves around on the plate until thoroughly dry. Store these herbs just as you would air-dried herbs.
Freezing
Freezing herbs is also easy to accomplish. Wash herbs and blanch them in boiling water for one minute. Cool herbs very quickly in ice water then drain. Package herbs in airtight plastic bags and store in the freezer.
Herbs can be delightfully easy to grow and they are an even more delightful addition to salads, sauces, pastas, teas and many other treats you can enjoy year-round.